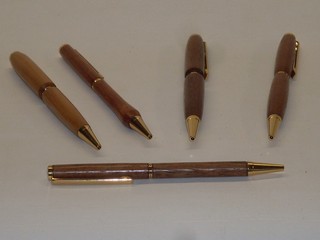
People are fascinated with the idea that someone other than a major manufacturing company can make a pen. It seems we have forgotten that people used to take a goose feather and whittle out a quill pen in a few seconds. Now it seems like every woodturner turns pens as well as bowls, spatulas, ornaments and other round things. Like many things in life it is as easy or as difficult as you would like to make it. Frankly, it is more "woodworking" than "woodturning," but is a great beginner project as it is easy to turn a basic pen, has basicturning techniques, and gives an example of lathe work that people can relate to. In addition, if you are already a woodworker, it gives a great tranistion to the round side of the craft. So, to begin with, let us turn a slimline pen.
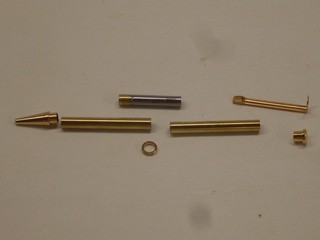
When you go to turn a pen you need a pen kit and pen turning hardware. A lot of supply companies will sell a beginning kit with (usually) 5 pen kits, a mandrel, something to hold the mandrel in the lathe, bushings to deparate the pen blanks, and perhaps a pen squaring tool. This is generally a good place to start. Your regular turning tools will work for turning pens. While some companies sell smaller tools for turning pens, they are not necessary. Regular sized tools are fine and having one set saves money.
The typical slimline pen kit will contain, from left to right,
- pen tip
- two brass tubes
- (above) twist pen mechanism
- (below) center band
- pen clip
- clip button
- not shown is the refill for the pen. This will be compatible with the Cross™ Company refills and frankly the Cross™ refills are superior but the included ones work fine.
Other hardware will be introduced as we go along and will make more sense as it is seen being used.
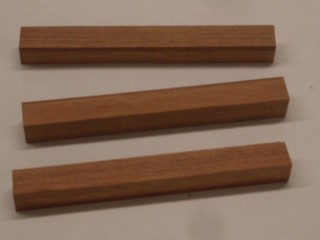
When non turners ask me how a pen is made I take a slimline, pull it apart at the center ring, and point to the brass tubes which can just be seen as rings in the end and tell them "I glue a brass tube in each of two half pen blanks, mount them to a mandrel on the lathe, turn the top and bottom and mount the other parts." They nod as if they understand.
Here are three pen blanks of ipe, sometimes called Brazilian Cherry or Brazilian Walnut although it is neither cherry nor walnut related. I cut them from scraps of flooring. Commerial pen blanks are usually about 6" long and 3/4" square. I tend to cut my own 5/8" square and 5" long for slimlines. It is less to cut off or turn off and works well for me.
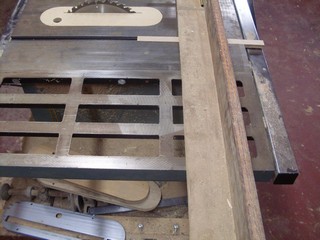
The blanks need to be cut in two as squarely as possible. I use a sled at the table saw but I have also used the bandsaw. Sometimes folks use a power mitre saw, but I find the blade too close for my liking for the cutting of such a small piece. That said, I am not bothered with the blade of the table saw, but I am more familiar with it. Use what works for you and be careful. Hand saw miter boxes work well and are very quick.
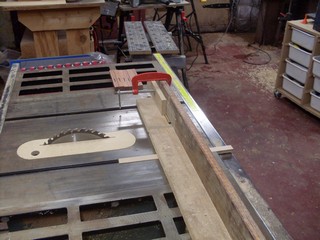
I adjust the stop for the pen blanks by using a brass tube from the kit as a measure. Making the blank a bit longer than the tube, say about 1/8" longer, gives a bit of leeway in case of blowout when drilling the blank. The tubes in a slimline kit will be the same length but in other kits the length and for that matter the diameter may vary.
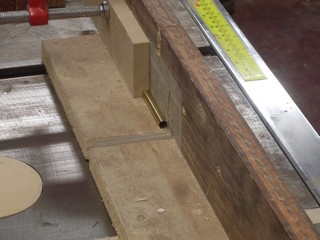
This gives a better view of the pen blank and the set up of the sled. It allows for quick and repeatable cuts. For me this is important as I seldom glue up less than 25 pens at a time. The sled is so long as it was originally made to cut table leg blanks to length for turning.
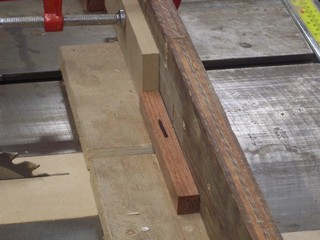
The pen blank is place on the sled ready to be cut. Note the pen mark in the center. This is to allow the center of the blank to be known when turning assembling the pen so that the grain continues in the line of the pen. The more often I do this the more I question the need. As soon as the pen is twisted open or closed the grain no longer lines up anyway. This is one of those decisions you just have to make on your own. On the other hand, distinctive markings on each set of pen blanks keeps similar woods from getting mixed up. This is valuable when you make a grouping of pens.


