How to Make an Oland Tool for Bowl Turning
This has become my favorite faceplate tool and used for a lot more as well. Easy to make and great to use.
Once upon a time, likely about twenty years ago, give or take, I needed a bowl gouge and had little cash, not an uncommon story. I recalled a story I had read about Knud oland as remembered by his friend, David Ellsworth. In it he had mentioned that Oland had had trouble finding what he wanted in a woodturning tool back in the 1970's so he designed his own. However, he intended that the tool be easy to make by anyone who wanted one and in the typical home workshop. It was a high speed steel tip in a steel shaft in a wooden handle.

This is a shot of my 1/4" Oland Tool. Note that this is a working tool and nothing was done to make it fancy for sale. I turned a handle about 14" long and drilled a 5/8 hole about 2 1/2" deep into it. The shaft is cold rolled steel with about 10" extended from the handle. The tip is a 1/4" x 2 1/2" HSS cutting tool, standard in the metal lathe industry.
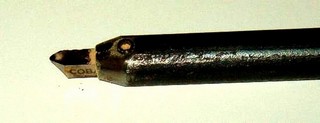
As you can see I have drilled and tapped for a set screw about 1/2" behind the tip. I find this sufficient to hold the tip in place although you might want to put another set screw about 1/2" behind the first. Out of habit I use 6mm x 1 set screws but 1/4" x 20 would work as well. I have also ground the end of the shaft back to give a bit more clearance for the cuts. The tip is ground to about 45 degrees and is usually more rounded than I have it here. I like the point and a slightly longer edge to the tip. This is a cutting tool and meant to be used with the bevel rubbing.
The problem with this explanation is it happened after I made the tool and did not really need another one at the time. However, this is an inserted tip tool. It needs:
- a handle just to hold on to it
- a shaft to hold a tip
- a tip to do the cutting
I found myself turning a flower pot and realized that I needed a hook tool for clearing the endgrain enterior. This is of course another inserted tip tool, or it is in my case. Some people make the shaft and hook from one piece of steel. In my case though, it duplicates making the Oland tool, so here is how to make either, or for that matter both.
The materials needed are
- an 18" length of cold rolled steel 3/4" in diameter
- an 18" length of 3/4" galvanized pipe or any other handle of your choice
- three set screws 6mm x 1mm
- hooks.

I wrote an article some time ago for More Woodturning Magazine explaining how to make hooks and hook tools, but it lacked illustration.
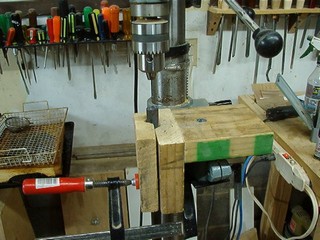
I use a very simple jig to hold the shaft for drilling. It is one v-block fastened to a block of wood at 90 degrees. It is bolted to the drill press table support. Another v-block holds the shaft in place and is tightened with a clamp. Begin to drill with a 1/6" diameter bit and work up gradually to 3/16" or whatever is necessary to hold your bits. I use a spot of oil from time to time to ease the cutting. Back the drill out frequently to clear the metal shavings. If you have ever had a drill bit jam with maple shavings, think of it and remember these are steel.
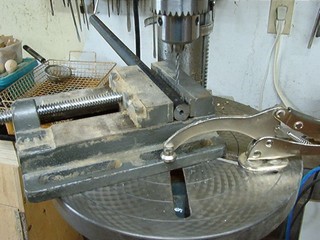
Now you need to drill for the set screw. Just hold the rod in place for the drill to cut. The set up I have here is both simple and inexpensive. The vise holds the rod steady and the clamp holds the vise. A v-block and clamps will work just as well, but I have these and it is a bit easier. Line up the drill bit carefully. Your tap should have a recommended hole size for tapping. I remove the appropriate drill from my set of bits that are graduated in 64ths, one of those sets of bits that everyone has on sale from time to time, so that I do not drill past that diameter. Work up from 1/16" again. It soon gets to be a habit.
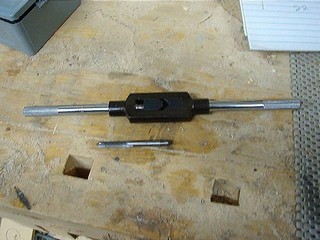
To tap the hole you need a tap that fits your intended set screw along with a tap wrench. I use 6mm x 1mm as a standard but 1/4" x 20 is a good one as well. For these small sizes especially, a dedicated tap wrench that costs under $10.00 is a good investment. This one is a bit of overkill at this size but works all the way up to 1/2" and will work for smaller.
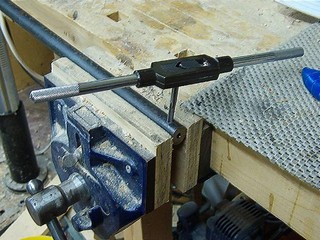
Tapping the hole is like driving a bolt with a wrench when the threads are covered with something sticky. Screw in a turn and back off a half turn. Do it again and again until the hole is tapped all the way through. From time to time add a touch of oil. It goes very quickly at this size. When you are all the way through, back out the tap, blow the hole clear, add a touch of oil and run the tap through a couple of times to clear the threads well. Put in place your bit and set screw.

Do the same drill and tap procedure to the galvanized steel handle about 1/2" and 1" back from the end. I am cheating a bit here as I am using the same handle that I use on my 3/8" Oland tool. The duct tape makes it a bit more comfortable for me especially on cold days.

This is the tool leaning up against the bench leg. Sometimes when I use it, especially with the Oland tip, I want to holler "Thar she blows!" and harpoon that wood.
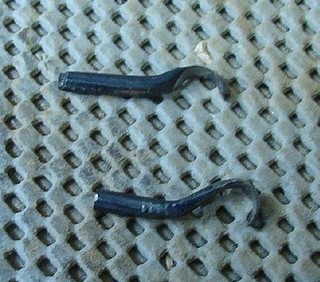
And these are a couple of the hooks that I use. If you plan on using a commercial hook or ring, just drill the appropriate holes in the shaft. It is easy to make the shaft double ended. Drill and tap the other end and flip it in the handle.
The Oland Tool In Use
Some people object to the Oland tool because it looks like a scraper and they want to make shavings. If you have a fast connection, here are a few 30 second movies of the Oland tool in use. The first is a 1/2" Oland removing the bark from a piece of poplar. Second is the same tool rounding down the poplar and turning one end for a bead. Third we have a 3/8" Oland with swept back edges beading the other end. Please keep in mind that this is wet, stringy poplar and the viewing, on my machine at least, appears to be in real time.
To give you some idea of the utility of the Oland tool, here a few pieces which have been turned using it. Each has been mounted first between centers and roughed out, then dried, mounted to a glue block and finish turned. After sanding they have been finished with tung oil.
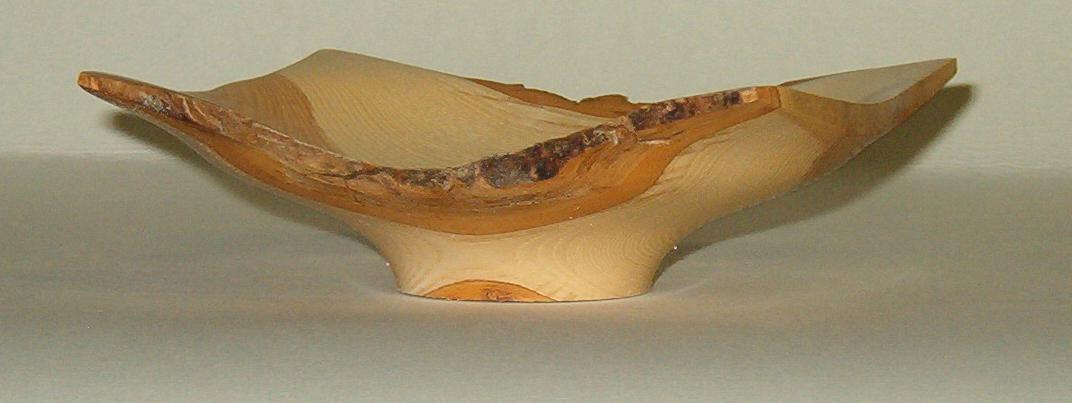
This ash bowl is about five inches square and 2 inches high.
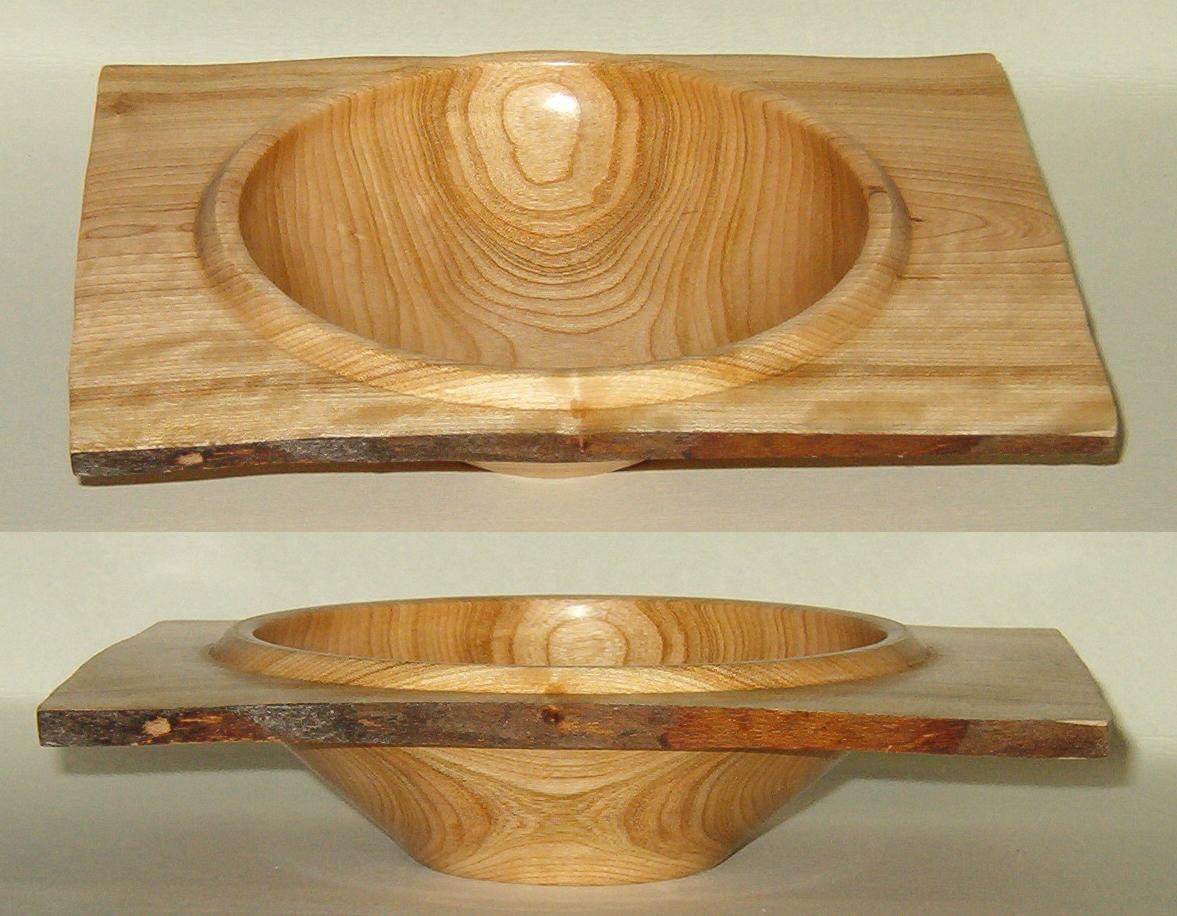
This rectangular bowl in black cherry is about 10 inches long by 9 wide and three high.


