
Using the Sanding Pad: Sanding a Bowl
Good sanding starts a great finish.
| When wood turning bowls, I like to power sand whenever possible. Sometimes a particular rim or style precludes the chance but usually it is possible. For this you need an electric drill and a sanding disk. If you need to make a disk see here or here . |
| I set my drill to about twice the speed of the lathe; here the drill is about 1200rpm for the lathe's 600rpm. Starting at the bottom of the bowl and moving slowly to the top I sand in the 9 - 12 o'clock section of the disk. Start with as coarse a grit as necessary. Some woods will easily call for an 80 grit and others may even need a 40. I know some turners who automatically reach for 60 or less. They turn a lot of spalted wood with easy tear out. |
 See video here
|
| Switch to the next highest grit and do it again unitl the sanding marks of each lower grit are eliminated. |
 See video here
|
| As I begin to sand the inside I notice that there is tear out in the end grain of this very dry ash. I put some paste wax on the tear out to help the sanding. I am not sure why this works but I do know it speeds things up. I use a mixture of about 5 parts 50/50 vegetable and mineral oil to one part bees wax. It never seems to bother any later finish I have ever used. |
 See video here
|
| The inside is sanded in the same fashion as the outside. Sanding takes place between 12 and 3 o'clock. Spend less time on the bottom than on the sides. The bottom is all side grain and the sides are a mixture of end grain and side grain. Work your way through the grits. I like to blow the dust off between grits with a blast from the air compressor. |
 See video here
|
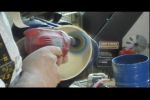
| There is still a bit of tear out so I take care of it with the lathe off. The pad needs to be kept moving at all times or else you will get a flat spot. I like 120 for this cleaning up of the last tearout or tool marks. Any finer takes too long and more coarse may tear in a vulnerable spot. |
 See video here
|
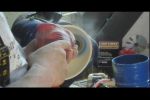
| Then turn the lathe back on and blend all the areas together. Now sand through successive grits until satisfied. Remove all scratches from previous grits before going to the next one. |
 See video here
|
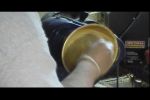
| Finally, put on a finish. Here I am padding on a mixture of varnish and thinner. Such a mix is often marketed as Danish oil or Tung oil. Regardless, it is a nice finish. Just pad it on, let it sit about ten minutes, pad on some more and after another fifteen minutes, wipe it down. Add a few more coats over the next few days to add depth. |
 See video here
|
back next
© 2015 copyright Darrell Feltmate, Around the Woods